# Standalone Activities - Python SDK
> Execute Activities independently without a Workflow using the Temporal Python SDK.
> **Public Preview** — Go, TypeScript, Java, .NET, Python
Standalone Activities are Activities that run independently, without being orchestrated by a
Workflow. Instead of starting an Activity from within a Workflow Definition, you start a Standalone
Activity directly from a Temporal Client.
The way you write the Activity and register it with a Worker is identical to [Workflow
Activities](/develop/python/activities/basics). The only difference is that you execute a
Standalone Activity directly from your Temporal Client.
This page covers the following:
- [Get Started with Standalone Activities](#get-started)
- [Run a Worker with the Activity registered](#run-worker)
- [Execute a Standalone Activity](#execute-activity)
- [Start a Standalone Activity without waiting for the result](#start-activity)
- [Get a handle to an existing Standalone Activity](#get-activity-handle)
- [Wait for the result of a Standalone Activity](#get-activity-result)
- [List Standalone Activities](#list-activities)
- [Count Standalone Activities](#count-activities)
- [Run Standalone Activities with Temporal Cloud](#run-standalone-activities-temporal-cloud)
> **📝 Note:**
>
> This documentation uses source code from the [hello_standalone_activity](https://github.com/temporalio/samples-python/tree/main/hello_standalone_activity) sample.
>
## Get Started with Standalone Activities
Prerequisites:
- **Python 3.9+**
- **[uv](https://docs.astral.sh/uv/)** - Python package manager. Install with:
```bash
brew install uv
```
Or see the [uv installation guide](https://docs.astral.sh/uv/getting-started/installation/) for other platforms.
- **Temporal Python SDK** (v1.23.0 or higher)
```bash
uv add temporalio
```
- **Temporal CLI** v1.7.0 or higher
Install with Homebrew:
```bash
brew install temporal
```
Or see the [Temporal CLI install guide](/cli/setup-cli) for other platforms.
Verify the installation:
```bash
temporal --version
```
Start the Temporal development server:
```bash
temporal server start-dev
```
This command automatically starts the Temporal development server with the Web UI, and creates the `default` Namespace.
It uses an in-memory database, so do not use it for real use cases.
> **ℹ️ Info:**
> Temporal Cloud
>
> All code samples on this page use
> [`ClientConfig.load_client_connect_config()`](https://python.temporal.io/temporalio.envconfig.ClientConfig.html)
> to configure the Temporal Client connection. It responds to [environment
> variables](/references/client-environment-configuration) and [TOML configuration
> files](/references/client-environment-configuration), so the same code works against a local dev
> server and Temporal Cloud without changes. See [Run Standalone Activities with Temporal
> Cloud](#run-standalone-activities-temporal-cloud) below.
>
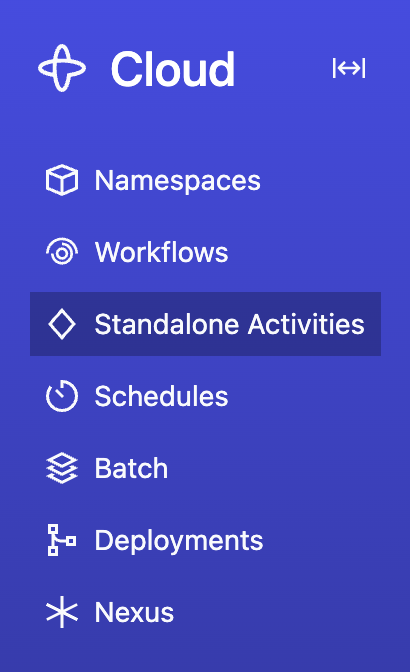
The Temporal Server will now be available for client connections on `localhost:7233`, and the
Temporal Web UI will now be accessible at [http://localhost:8233](http://localhost:8233). Standalone
Activities are available from the nav bar item located towards the top left of the page:
 Clone the [samples-python](https://github.com/temporalio/samples-python) repository to follow along:
```
git clone https://github.com/temporalio/samples-python.git
cd samples-python
```
The sample project is structured as follows:
```
hello_standalone_activity/
├── my_activity.py
├── worker.py
├── execute_activity.py
├── start_activity.py
├── list_activities.py
└── count_activities.py
```
## Write an Activity Function
An Activity in the Temporal Python SDK is just a normal function with the `@activity.defn`
decorator. It can optionally be an `async def`. The way you write a Standalone Activity is identical
to how you write an Activity to be orchestrated by a Workflow. In fact, an Activity can be executed
both as a Standalone Activity and as a Workflow Activity.
[hello_standalone_activity/my_activity.py](https://github.com/temporalio/samples-python/blob/main/hello_standalone_activity/my_activity.py)
```python
# my_activity.py
from dataclasses import dataclass
from temporalio import activity
@dataclass
class ComposeGreetingInput:
greeting: str
name: str
@activity.defn
def compose_greeting(input: ComposeGreetingInput) -> str:
activity.logger.info("Running activity with parameter %s" % input)
return f"{input.greeting}, {input.name}!"
```
## Run a Worker with the Activity registered
Running a Worker for Standalone Activities is the same as running a Worker for Workflow Activities —
you create a Worker, register the Activity, and run the Worker. The Worker doesn't need to know
whether the Activity will be invoked from a Workflow or as a Standalone Activity. See [How to run a
Worker](/develop/python/workers/run-worker-process#run-a-dev-worker) for more details on Worker setup and
configuration options.
[hello_standalone_activity/worker.py](https://github.com/temporalio/samples-python/blob/main/hello_standalone_activity/worker.py)
```python
import asyncio
from concurrent.futures import ThreadPoolExecutor
from temporalio.client import Client
from temporalio.envconfig import ClientConfig
from temporalio.worker import Worker
from hello_standalone_activity.my_activity import compose_greeting
async def main():
connect_config = ClientConfig.load_client_connect_config()
connect_config.setdefault("target_host", "localhost:7233")
client = await Client.connect(**connect_config)
worker = Worker(
client,
task_queue="my-standalone-activity-task-queue",
activities=[compose_greeting],
activity_executor=ThreadPoolExecutor(5),
)
print("worker running...", end="", flush=True)
await worker.run()
if __name__ == "__main__":
asyncio.run(main())
```
Open a new terminal, navigate to the `samples-python` directory, and run the Worker:
```bash
uv run hello_standalone_activity/worker.py
```
Leave this terminal running - the Worker needs to stay up to process activities.
## Execute a Standalone Activity
Use
[`client.execute_activity()`](https://python.temporal.io/temporalio.client.Client.html#execute_activity)
to execute a Standalone Activity. Call this from your application code, not from inside a Workflow
Definition. This durably enqueues your Standalone Activity in the Temporal Server, waits for it to
be executed on your Worker, and then fetches the result.
[hello_standalone_activity/execute_activity.py](https://github.com/temporalio/samples-python/blob/main/hello_standalone_activity/execute_activity.py)
```python
import asyncio
from datetime import timedelta
from temporalio.client import Client
from temporalio.envconfig import ClientConfig
from hello_standalone_activity.my_activity import ComposeGreetingInput, compose_greeting
async def my_application():
connect_config = ClientConfig.load_client_connect_config()
connect_config.setdefault("target_host", "localhost:7233")
client = await Client.connect(**connect_config)
activity_result = await client.execute_activity(
compose_greeting,
args=[ComposeGreetingInput("Hello", "World")],
id="my-standalone-activity-id",
task_queue="my-standalone-activity-task-queue",
start_to_close_timeout=timedelta(seconds=10),
)
print(f"Activity result: {activity_result}")
if __name__ == "__main__":
asyncio.run(my_application())
```
To run it:
1. Make sure the Temporal Server is running (from the [Get Started](#get-started) step above).
2. Make sure the Worker is running (from the [Run a Worker](#run-worker) step above).
3. Open a new terminal, navigate to the `samples-python` directory, and run:
```bash
uv run hello_standalone_activity/execute_activity.py
```
Or use the Temporal CLI:
```bash
temporal activity execute \
--type compose_greeting \
--activity-id my-standalone-activity-id \
--task-queue my-standalone-activity-task-queue \
--start-to-close-timeout 10s \
--input '{"greeting": "Hello", "name": "World"}'
```
## Start a Standalone Activity without waiting for the result
Starting a Standalone Activity means sending a request to the Temporal Server to durably enqueue
your Activity job, without waiting for it to be executed by your Worker.
Use
[`client.start_activity()`](https://python.temporal.io/temporalio.client.Client.html#start_activity)
to start your Standalone Activity and get a handle:
```python
activity_handle = await client.start_activity(
compose_greeting,
args=[ComposeGreetingInput("Hello", "World")],
id="my-standalone-activity-id",
task_queue="my-standalone-activity-task-queue",
start_to_close_timeout=timedelta(seconds=10),
)
```
With the Temporal Server and Worker running, open a new terminal in the `samples-python` directory and run:
```bash
uv run hello_standalone_activity/start_activity.py
```
Or use the Temporal CLI:
```bash
temporal activity start \
--type compose_greeting \
--activity-id my-standalone-activity-id \
--task-queue my-standalone-activity-task-queue \
--start-to-close-timeout 10s \
--input '{"greeting": "Hello", "name": "World"}'
```
## Get a handle to an existing Standalone Activity
You can also use `client.get_activity_handle()` to create a handle to a previously started Standalone Activity:
```python
activity_handle = client.get_activity_handle(
activity_id="my-standalone-activity-id",
run_id="the-run-id",
)
```
You can now use the handle to wait for the result, describe, cancel, or terminate the Activity.
## Wait for the result of a Standalone Activity
Under the hood, calling `client.execute_activity()` is the same as calling
[`client.start_activity()`](https://python.temporal.io/temporalio.client.Client.html#start_activity)
to durably enqueue the Standalone Activity, and then calling `await activity_handle.result()` to
wait for the activity to be executed and fetch the result:
```python
activity_result = await activity_handle.result()
```
Or use the Temporal CLI to wait for a result by Activity ID:
```bash
temporal activity result --activity-id my-standalone-activity-id
```
## List Standalone Activities
Use
[`client.list_activities()`](https://python.temporal.io/temporalio.client.Client.html#list_activities)
to list Standalone Activity Executions that match a [List Filter](/list-filter) query. The result is
an async iterator that yields ActivityExecution entries.
These APIs return only Standalone Activity Executions. Activities running inside Workflows are not included.
[hello_standalone_activity/list_activities.py](https://github.com/temporalio/samples-python/blob/main/hello_standalone_activity/list_activities.py)
```python
import asyncio
from temporalio.client import Client
from temporalio.envconfig import ClientConfig
async def my_application():
connect_config = ClientConfig.load_client_connect_config()
connect_config.setdefault("target_host", "localhost:7233")
client = await Client.connect(**connect_config)
activities = client.list_activities(
query="TaskQueue = 'my-standalone-activity-task-queue'",
)
async for info in activities:
print(
f"ActivityID: {info.activity_id}, Type: {info.activity_type}, Status: {info.status}"
)
if __name__ == "__main__":
asyncio.run(my_application())
```
Run it:
```bash
uv run hello_standalone_activity/list_activities.py
```
Or use the Temporal CLI:
```bash
temporal activity list
```
The query parameter accepts the same [List Filter](/list-filter) syntax used for [Workflow
Visibility](/visibility). For example, "ActivityType = 'MyActivity' AND Status = 'Running'".
## Count Standalone Activities
Use [`client.count_activities()`](https://python.temporal.io/temporalio.client.Client.html#count_activities) to count
Standalone Activity Executions that match a [List Filter](/list-filter) query. This returns the total
count of executions (running, completed, failed, etc.) - not the number of queued tasks. It works the
same way as counting Workflow Executions.
[hello_standalone_activity/count_activities.py](https://github.com/temporalio/samples-python/blob/main/hello_standalone_activity/count_activities.py)
```python
import asyncio
from temporalio.client import Client
from temporalio.envconfig import ClientConfig
async def my_application():
connect_config = ClientConfig.load_client_connect_config()
connect_config.setdefault("target_host", "localhost:7233")
client = await Client.connect(**connect_config)
resp = await client.count_activities(
query="TaskQueue = 'my-standalone-activity-task-queue'",
)
print("Total activities:", resp.count)
for group in resp.groups:
print(f"Group {group.group_values}: {group.count}")
if __name__ == "__main__":
asyncio.run(my_application())
```
Run it:
```bash
uv run hello_standalone_activity/count_activities.py
```
Or use the Temporal CLI:
```bash
temporal activity count
```
## Run Standalone Activities with Temporal Cloud
The code samples on this page use `ClientConfig.load_client_connect_config()`, so the same code
works against Temporal Cloud - just configure the connection via environment variables or a TOML
profile. No code changes are needed.
For a step-by-step guide on connecting to Temporal Cloud, including Namespace creation, certificate
generation, and authentication setup in the Cloud UI, see
[Connect to Temporal Cloud](/develop/python/client/temporal-client#connect-to-temporal-cloud).
### Connect with mTLS
Set these environment variables with values from your Temporal Cloud Namespace settings:
```
export TEMPORAL_ADDRESS=..tmprl.cloud:7233
export TEMPORAL_NAMESPACE=.
export TEMPORAL_TLS_CLIENT_CERT_PATH='path/to/your/client.pem'
export TEMPORAL_TLS_CLIENT_KEY_PATH='path/to/your/client.key'
```
### Connect with an API key
Set these environment variables with values from your Temporal Cloud API key settings:
```
export TEMPORAL_ADDRESS=..tmprl.cloud:7233
export TEMPORAL_NAMESPACE=.
export TEMPORAL_API_KEY=
```
Then run the Worker and starter code as shown in the earlier sections.
Clone the [samples-python](https://github.com/temporalio/samples-python) repository to follow along:
```
git clone https://github.com/temporalio/samples-python.git
cd samples-python
```
The sample project is structured as follows:
```
hello_standalone_activity/
├── my_activity.py
├── worker.py
├── execute_activity.py
├── start_activity.py
├── list_activities.py
└── count_activities.py
```
## Write an Activity Function
An Activity in the Temporal Python SDK is just a normal function with the `@activity.defn`
decorator. It can optionally be an `async def`. The way you write a Standalone Activity is identical
to how you write an Activity to be orchestrated by a Workflow. In fact, an Activity can be executed
both as a Standalone Activity and as a Workflow Activity.
[hello_standalone_activity/my_activity.py](https://github.com/temporalio/samples-python/blob/main/hello_standalone_activity/my_activity.py)
```python
# my_activity.py
from dataclasses import dataclass
from temporalio import activity
@dataclass
class ComposeGreetingInput:
greeting: str
name: str
@activity.defn
def compose_greeting(input: ComposeGreetingInput) -> str:
activity.logger.info("Running activity with parameter %s" % input)
return f"{input.greeting}, {input.name}!"
```
## Run a Worker with the Activity registered
Running a Worker for Standalone Activities is the same as running a Worker for Workflow Activities —
you create a Worker, register the Activity, and run the Worker. The Worker doesn't need to know
whether the Activity will be invoked from a Workflow or as a Standalone Activity. See [How to run a
Worker](/develop/python/workers/run-worker-process#run-a-dev-worker) for more details on Worker setup and
configuration options.
[hello_standalone_activity/worker.py](https://github.com/temporalio/samples-python/blob/main/hello_standalone_activity/worker.py)
```python
import asyncio
from concurrent.futures import ThreadPoolExecutor
from temporalio.client import Client
from temporalio.envconfig import ClientConfig
from temporalio.worker import Worker
from hello_standalone_activity.my_activity import compose_greeting
async def main():
connect_config = ClientConfig.load_client_connect_config()
connect_config.setdefault("target_host", "localhost:7233")
client = await Client.connect(**connect_config)
worker = Worker(
client,
task_queue="my-standalone-activity-task-queue",
activities=[compose_greeting],
activity_executor=ThreadPoolExecutor(5),
)
print("worker running...", end="", flush=True)
await worker.run()
if __name__ == "__main__":
asyncio.run(main())
```
Open a new terminal, navigate to the `samples-python` directory, and run the Worker:
```bash
uv run hello_standalone_activity/worker.py
```
Leave this terminal running - the Worker needs to stay up to process activities.
## Execute a Standalone Activity
Use
[`client.execute_activity()`](https://python.temporal.io/temporalio.client.Client.html#execute_activity)
to execute a Standalone Activity. Call this from your application code, not from inside a Workflow
Definition. This durably enqueues your Standalone Activity in the Temporal Server, waits for it to
be executed on your Worker, and then fetches the result.
[hello_standalone_activity/execute_activity.py](https://github.com/temporalio/samples-python/blob/main/hello_standalone_activity/execute_activity.py)
```python
import asyncio
from datetime import timedelta
from temporalio.client import Client
from temporalio.envconfig import ClientConfig
from hello_standalone_activity.my_activity import ComposeGreetingInput, compose_greeting
async def my_application():
connect_config = ClientConfig.load_client_connect_config()
connect_config.setdefault("target_host", "localhost:7233")
client = await Client.connect(**connect_config)
activity_result = await client.execute_activity(
compose_greeting,
args=[ComposeGreetingInput("Hello", "World")],
id="my-standalone-activity-id",
task_queue="my-standalone-activity-task-queue",
start_to_close_timeout=timedelta(seconds=10),
)
print(f"Activity result: {activity_result}")
if __name__ == "__main__":
asyncio.run(my_application())
```
To run it:
1. Make sure the Temporal Server is running (from the [Get Started](#get-started) step above).
2. Make sure the Worker is running (from the [Run a Worker](#run-worker) step above).
3. Open a new terminal, navigate to the `samples-python` directory, and run:
```bash
uv run hello_standalone_activity/execute_activity.py
```
Or use the Temporal CLI:
```bash
temporal activity execute \
--type compose_greeting \
--activity-id my-standalone-activity-id \
--task-queue my-standalone-activity-task-queue \
--start-to-close-timeout 10s \
--input '{"greeting": "Hello", "name": "World"}'
```
## Start a Standalone Activity without waiting for the result
Starting a Standalone Activity means sending a request to the Temporal Server to durably enqueue
your Activity job, without waiting for it to be executed by your Worker.
Use
[`client.start_activity()`](https://python.temporal.io/temporalio.client.Client.html#start_activity)
to start your Standalone Activity and get a handle:
```python
activity_handle = await client.start_activity(
compose_greeting,
args=[ComposeGreetingInput("Hello", "World")],
id="my-standalone-activity-id",
task_queue="my-standalone-activity-task-queue",
start_to_close_timeout=timedelta(seconds=10),
)
```
With the Temporal Server and Worker running, open a new terminal in the `samples-python` directory and run:
```bash
uv run hello_standalone_activity/start_activity.py
```
Or use the Temporal CLI:
```bash
temporal activity start \
--type compose_greeting \
--activity-id my-standalone-activity-id \
--task-queue my-standalone-activity-task-queue \
--start-to-close-timeout 10s \
--input '{"greeting": "Hello", "name": "World"}'
```
## Get a handle to an existing Standalone Activity
You can also use `client.get_activity_handle()` to create a handle to a previously started Standalone Activity:
```python
activity_handle = client.get_activity_handle(
activity_id="my-standalone-activity-id",
run_id="the-run-id",
)
```
You can now use the handle to wait for the result, describe, cancel, or terminate the Activity.
## Wait for the result of a Standalone Activity
Under the hood, calling `client.execute_activity()` is the same as calling
[`client.start_activity()`](https://python.temporal.io/temporalio.client.Client.html#start_activity)
to durably enqueue the Standalone Activity, and then calling `await activity_handle.result()` to
wait for the activity to be executed and fetch the result:
```python
activity_result = await activity_handle.result()
```
Or use the Temporal CLI to wait for a result by Activity ID:
```bash
temporal activity result --activity-id my-standalone-activity-id
```
## List Standalone Activities
Use
[`client.list_activities()`](https://python.temporal.io/temporalio.client.Client.html#list_activities)
to list Standalone Activity Executions that match a [List Filter](/list-filter) query. The result is
an async iterator that yields ActivityExecution entries.
These APIs return only Standalone Activity Executions. Activities running inside Workflows are not included.
[hello_standalone_activity/list_activities.py](https://github.com/temporalio/samples-python/blob/main/hello_standalone_activity/list_activities.py)
```python
import asyncio
from temporalio.client import Client
from temporalio.envconfig import ClientConfig
async def my_application():
connect_config = ClientConfig.load_client_connect_config()
connect_config.setdefault("target_host", "localhost:7233")
client = await Client.connect(**connect_config)
activities = client.list_activities(
query="TaskQueue = 'my-standalone-activity-task-queue'",
)
async for info in activities:
print(
f"ActivityID: {info.activity_id}, Type: {info.activity_type}, Status: {info.status}"
)
if __name__ == "__main__":
asyncio.run(my_application())
```
Run it:
```bash
uv run hello_standalone_activity/list_activities.py
```
Or use the Temporal CLI:
```bash
temporal activity list
```
The query parameter accepts the same [List Filter](/list-filter) syntax used for [Workflow
Visibility](/visibility). For example, "ActivityType = 'MyActivity' AND Status = 'Running'".
## Count Standalone Activities
Use [`client.count_activities()`](https://python.temporal.io/temporalio.client.Client.html#count_activities) to count
Standalone Activity Executions that match a [List Filter](/list-filter) query. This returns the total
count of executions (running, completed, failed, etc.) - not the number of queued tasks. It works the
same way as counting Workflow Executions.
[hello_standalone_activity/count_activities.py](https://github.com/temporalio/samples-python/blob/main/hello_standalone_activity/count_activities.py)
```python
import asyncio
from temporalio.client import Client
from temporalio.envconfig import ClientConfig
async def my_application():
connect_config = ClientConfig.load_client_connect_config()
connect_config.setdefault("target_host", "localhost:7233")
client = await Client.connect(**connect_config)
resp = await client.count_activities(
query="TaskQueue = 'my-standalone-activity-task-queue'",
)
print("Total activities:", resp.count)
for group in resp.groups:
print(f"Group {group.group_values}: {group.count}")
if __name__ == "__main__":
asyncio.run(my_application())
```
Run it:
```bash
uv run hello_standalone_activity/count_activities.py
```
Or use the Temporal CLI:
```bash
temporal activity count
```
## Run Standalone Activities with Temporal Cloud
The code samples on this page use `ClientConfig.load_client_connect_config()`, so the same code
works against Temporal Cloud - just configure the connection via environment variables or a TOML
profile. No code changes are needed.
For a step-by-step guide on connecting to Temporal Cloud, including Namespace creation, certificate
generation, and authentication setup in the Cloud UI, see
[Connect to Temporal Cloud](/develop/python/client/temporal-client#connect-to-temporal-cloud).
### Connect with mTLS
Set these environment variables with values from your Temporal Cloud Namespace settings:
```
export TEMPORAL_ADDRESS=..tmprl.cloud:7233
export TEMPORAL_NAMESPACE=.
export TEMPORAL_TLS_CLIENT_CERT_PATH='path/to/your/client.pem'
export TEMPORAL_TLS_CLIENT_KEY_PATH='path/to/your/client.key'
```
### Connect with an API key
Set these environment variables with values from your Temporal Cloud API key settings:
```
export TEMPORAL_ADDRESS=..tmprl.cloud:7233
export TEMPORAL_NAMESPACE=.
export TEMPORAL_API_KEY=
```
Then run the Worker and starter code as shown in the earlier sections.